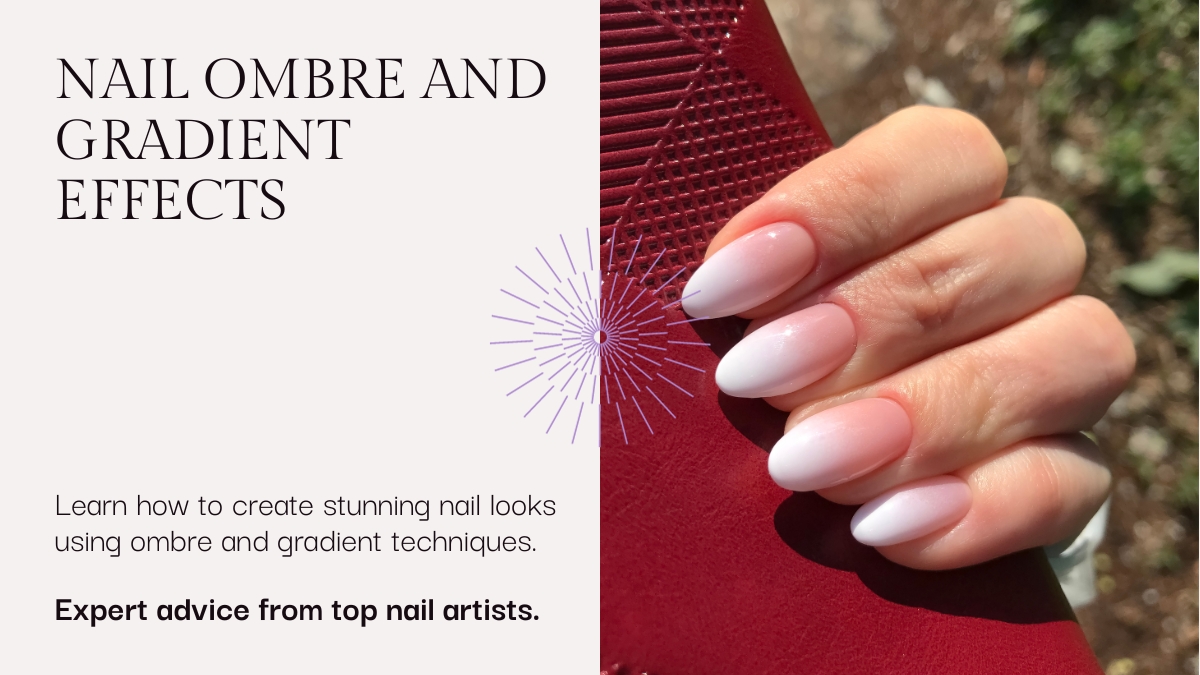
Nail ombre and gradient effects have become popular in nail art, offering a seamless and mesmerizing gradient effect that captivates the eye. From subtle transitions to bold color combinations, ombre nails allow endless creativity and personalization. Whether you prefer a classic French ombre or a vibrant rainbow gradient, there are many ways to achieve this stunning look.
One of the most popular techniques for creating ombre nails is using a sponge. You can create a smooth and even gradient effect by painting two or more colors onto a makeup sponge and then dabbing them onto the nail. Another popular method is using a nail brush to blend the colors on the nail itself. With practice and patience, anyone can master the art of ombre nails and create a unique and beautiful look. In this article, we will guide you on how to create gorgeous gradient effects with nail ombre.
Table of contents
Understanding Nail Ombre and Gradient Effects
We all want our nails to look beautiful and stylish, and that’s where nail art comes in. One of the most popular nail art styles is the ombre and gradient effect. These two techniques involve blending two or more colors to transition from one color to another seamlessly.
The ombre effect is achieved by blending two colors to fade into each other gradually. This creates a beautiful, subtle gradient effect that is perfect for any occasion. The gradient effect, on the other hand, involves blending two or more colors to create a fading effect. This effect can be achieved by combining the colors horizontally or vertically.
Ombre nails and gradient nails have become increasingly popular over the years. These techniques allow for endless creativity and personalization. They can be done with any color combination, and the possibilities are endless.
One of the best things about ombre and gradient nails is that they are easy to do at home. All you need is some nail polish and a makeup sponge. Paint your nails with the base color and let them dry. Then, apply the second color to the makeup sponge and dab it onto your nails. Keep wiping until you achieve the desired effect.
Another way to achieve the ombre and gradient effect is by using a nail brush. After applying the base color, dip the brush into the second color and apply it to the tip of your nails. Then, blend the colors using a back-and-forth motion until you achieve the desired effect.
In conclusion, ombre and gradient nails are a beautiful and stylish way to express your creativity and personality. These techniques are easy at home and can be done with any color combination. You can achieve a stunning and seamless transition from one color to another with some practice and patience.
Essential Tools and Materials

Having the right tools and materials is essential when achieving the perfect ombre or gradient effect on your nails. Here are some of the items we recommend for creating flawless nail art.
Choosing the Right Nail Polishes
Choosing the suitable nail polishes is crucial for achieving a beautiful ombre or gradient effect. You’ll want to select two or more colors that blend well together. Consider using gel nail polish colors for a longer-lasting finish. White nail polish can also be used as a base color to help the other colors pop.
Nail Preparation Tools
Before applying any nail polish, it’s important to prep your nails properly. This includes using a cuticle pusher to push back your cuticles and a nail file to shape and smooth your nails. You can also use a cotton swab dipped in nail polish remover to clean your nails and remove any oils or residue.
Application Tools
You’ll need some application tools to create a smooth, seamless gradient effect. A sponge or small brush can be used to blend the colors. A makeup sponge is also great for creating a soft and subtle gradient. Glitter and stones can be added for some extra sparkle and dimension.
Additional Materials
In addition to the essential tools mentioned above, a few other materials can help you achieve the perfect ombre or gradient effect. A base coat will help your nail polish adhere better and last longer. A top coat will give your nails a glossy finish and protect them from chipping. A matte top coat can also be used for a more subtle and sophisticated look. Finally, glitter polish can add extra shine and sparkle to your nails.
With these essential tools and materials, you can create stunning ombre and gradient nail designs at home.
Preparing Your Nails for Ombre and Gradient Effects
We must prepare our nails properly before creating beautiful gradient effects with gel ombre nails. Proper preparation ensures the nail bed is clean and free from any oils or debris that may interfere with applying the gel polish. Here’s how we prepare our nails for ombre and gradient effects:
Step 1: Remove old nail polish
The first step is to remove any old nail polish using a nail polish remover. We recommend using an acetone-based remover to remove stubborn nail polish more effectively. Apply a small amount of remover on a cotton ball and gently rub it over each nail until the polish is completely removed.
Step 2: Trim and shape your nails
Next, we trim and shape our nails with a nail clipper and file. We prefer a rounded or square shape, but you can choose any shape that suits your preference. Be sure to file your nails in one direction to prevent them from splitting or breaking.
Step 3: Soak your nails
After trimming and shaping our nails, we soak them in warm water for a few minutes. This softens the cuticles and makes them easier to push back. Adding a few drops of essential oils to the water for a relaxing and soothing experience.
Step 4: Push back cuticles
Once our nails are soaked, we use a cuticle pusher to push back the cuticles gently. This exposes the entire nail bed and ensures the gel polish adheres properly. Be gentle when pushing back the cuticles to avoid damaging them.
Step 5: Clean your nails
After pushing back the cuticles, we clean our nails with a nail brush and soap. This removes any dirt or debris that may have accumulated under the nails. Rinse your nails with warm water and dry them with a towel.
Step 6: Apply a base coat
Finally, we apply a base coat to our nails. This protects the nails from staining and ensures the gel polish adheres properly. Allow the base coat to dry completely before applying the gel polish.
These simple steps ensure that our nails are adequately prepared for ombre and gradient effects. Proper preparation ensures that the gel polish adheres appropriately and lasts longer.
Step-by-Step Guide to Creating Ombre Nails
Creating ombre nails can seem daunting, but with the right tools and technique, you can achieve a salon-quality look right at home. Here is our step-by-step guide to creating ombre nails:
Step 1: Prep Your Nails
Before starting, make sure your nails are clean and dry. File and shape them to your desired length. Apply a base coat to protect your nails from staining and to help the polish adhere better. Let the base coat dry completely.
Step 2: Choose Your Colors
Choose two or more colors that will blend well together. For a classic ombre look, choose a light and a dark shade of the same color. You can also use contrasting colors for a bold look or a color combination that matches your outfit or mood.
Step 3: Apply the Lightest Shade
Apply the lightest shade as your base color. Let it dry completely before moving on to the next step.
Step 4: Sponge on the Darker Shade
Take a makeup sponge and apply the darker shade to the tip of the sponge. Dab the sponge onto your nails, starting at the tip and working your way up to the middle of the nail. Repeat until you achieve the desired gradient effect. Make sure to blend the colors well for a seamless transition.
Step 5: Add More Layers
If you want a more intense color, repeat step 4 until you achieve the desired intensity. Apply each layer in a thin layer for the best results.
Step 6: Apply a Top Coat
Once satisfied with the gradient effect, apply a thin layer of top coat to protect your nails and give them a glossy finish. Let the top coat dry completely before doing any activities that may damage your nails.
That’s it! You now have beautiful ombre nails that will last for days. With some practice, you can experiment with different color combinations and techniques to create unique looks that suit your style.
Step-by-Step Guide to Creating Gradient Nails
Creating gradient nails is a fun and easy way to add color to your nails. With just a few simple steps, you can achieve a beautiful and seamless gradient effect, with everyone asking where you got your nails done. Here’s our step-by-step guide to creating gradient nails.
Step 1: Prep Your Nails
Before creating your gradient nails, you need to prep your nails. Start by removing old nail polish and filing your nails to your desired shape. Then, apply a base coat to protect your nails and help your polish last longer.
Step 2: Choose Your Colors
The next step is to choose your colors. You can use any colors you like, but choosing colors that blend well together is best. You can also add a glitter gradient or chunkier glitter to add some sparkle to your nails.
Step 3: Apply Your Base Color
Once you have your colors picked out, it’s time to apply your base color. This will be the color that shows up the most on your nails. Apply one or two coats of your base color and let it dry completely.
Step 4: Apply Your Colors
Now, it’s time to apply your colors. Start by painting a stripe of each color on a makeup sponge. Then, dab the sponge on your nails, moving from side to side, to blend the colors. You may need to do this several times to get the desired effect.
Step 5: Add Glitter
If you want to add a glitter gradient, now is the time. Apply a coat of glitter polish to the sponge and dab it onto your nails, focusing on the tips of your nails.
Step 6: Apply Top Coat
Finally, apply a top coat to seal your design and make it last longer. Let your nails dry completely before doing anything with your hands.
And there you have it! A simple and easy way to create gorgeous gradient nails at home.
Advanced Techniques and Designs
If you’re looking to take your nail ombre and gradient designs to the next level, there are a few advanced techniques and designs to consider. Here are some ideas to inspire your next nail art creation:
Vertical and Horizontal Designs
Instead of the traditional diagonal gradient, try creating a vertical or horizontal gradient design. This can be achieved by painting one color on the top half of the nail and another color on the bottom half, then blending them in the middle. This technique can create a sleek, modern look perfect for any occasion.
Using Contrasting Colors
Another way to elevate your ombre nail design is to use contrasting colors. This means pairing colors opposite each other on the color wheel, such as blue and orange or purple and yellow. This creates a bold and eye-catching look that is sure to turn heads.
Incorporating Glitter and Stones
Consider incorporating glitter and stones into your ombre design for a more glamorous look. Chunkier glitter can be applied to the tips of the nails for a gradient effect, while smaller glitter can be blended with the ombre colors. Stones can also be placed strategically on the nails for added sparkle and texture.
To apply glitter and stones, use a clear base coat and a small brush to place them where desired. For glitter, apply a layer of glitter polish and then blend it in with the ombre colors. For stones, use a small amount of nail glue to secure them to the nail.
With these advanced techniques and designs, you can take your nail ombre and gradient designs to the next level. Whether you’re looking for a sleek and modern look or a bold and glamorous one, there are endless possibilities when it comes to nail art.
Maintaining and Removing Your Nail Art

Maintaining your nail art is essential to keep it looking beautiful and fresh for as long as possible. Here are some tips to help you maintain your nail ombre and gradient effects:
When removing your nail art, it’s essential to do it correctly to avoid damaging your nails. Here are some tips to help you remove your nail ombre and gradient effects:
By following these tips, you can maintain and remove your nail art safely and without damaging your nails.
Leave a Reply