Creative nail art is the way to go if you’re looking for a way to make a statement with your nails. With the right tools and tricks, you can achieve salon-worthy designs from the comfort of your own home. In this article, we’ll share some of our favorite creative nail art hacks that are easy to do and will make your nails stand out.

One of the easiest ways to add some creativity to your nails is with a simple accent nail. Painting one nail a different color or using a different design can add some interest to your manicure without going overboard. Another way to switch things up is using different textures, such as matte and glossy finishes, or adding glitter or rhinestones to your nails. These small touches can make a significant impact and give your nails a unique look.
If you’re feeling more adventurous, there are plenty of creative nail art designs to try. The possibilities are endless, from ombre and gradient designs to geometric shapes and florals. With some practice and the right tools, you can create intricate designs that will impress everyone around you. Whether you’re a beginner or an experienced nail artist, these creative nail art hacks will help you take your manicures to the next level.
Table of contents
Understanding the Basics
Nail Polish Basics
As nail art enthusiasts, it’s essential to understand the basics of nail polish. Nail polish is a lacquer to add color and shine to the nails. It can be made from various materials, but most commonly, it’s made from nitrocellulose dissolved in solvents like ethyl acetate or butyl acetate.
When choosing a nail polish, it’s essential to consider the quality of the polish. High-quality nail polishes tend to be more pigmented, have a smoother application, and last longer. Additionally, it’s essential to consider the ingredients in the polish. Some people may have allergies or sensitivities to certain ingredients, so reading the label before purchasing is important.
The Art of Nail Painting
Nail painting involves more than just applying color to your nails. It’s essential to properly prepare your nails before painting to ensure a smooth and long-lasting application. Here are some basic steps to follow:
- Start by removing any old nail polish with a non-acetone nail polish remover.
- File and shape your nails to your desired length and shape.
- Apply a base coat to your nails. This will help the polish adhere better and prevent staining.
- Apply 2-3 coats of your chosen nail polish color, allowing each coat to dry before applying the next.
- Finish with a top coat to add shine and protect your polish from chipping.
Choosing the Right Colors
Choosing the right colors for your nail art can be daunting, but it’s essential to consider your skin tone, the occasion, and your style. Here are some tips to keep in mind:
By understanding the basics of nail polish, the art of nail painting, and choosing the right colors, you’ll be well on your way to creating beautiful and creative nail art looks.
Preparation Techniques
When it comes to nail art, preparation is critical. Before creating beautiful designs, we must ensure our nails are in the best possible condition. Here are a few preparation techniques that we recommend:
The Importance of Base Coat
A base coat is a clear polish applied to the nails before any color or design. It acts as a barrier between the nail and the polish, preventing staining and chipping. Not only does a base coat protect your nails, but it also helps the polish adhere better, making it last longer.
When choosing a base coat, look for one specifically designed for nail art. These base coats are often thicker and more durable, providing a better surface for your designs.
Prepping with Vinegar
Vinegar may not be the most pleasant-smelling substance, but it can work wonders for your nails. Before applying any polish, soak your nails in a solution of equal parts vinegar and water for a few minutes. This will help remove any oils or dirt from your nails, ensuring the polish adheres better.
Using a White Base Coat
Consider using a white base coat if you want your nail art to pop. This will make the colors of your design more vibrant and true to life. It can also help to cover up any imperfections in your nails, creating a smooth surface for your design.
To apply a white base coat, paint a layer of white polish onto your nails before adding any design. Let the base coat dry completely before moving on to the next step.
By following these preparation techniques, you’ll be well on your way to creating beautiful and long-lasting nail art designs. Always take the time to properly prepare your nails before starting any design, and you’ll be rewarded with stunning results.
Creative Nail Art Designs
When it comes to nail art, the possibilities are endless. With some creativity, you can transform your nails into a work of art that reflects your style. Here are some creative nail art designs that you can try at home.
Polka Dots and Striped Nails
Polka dots and stripes are classic nail art designs that never go out of style. You can use a toothpick or a dotting tool to create polka dots to make small dots on your nails. For striped nails, you can use tape to create straight lines or a striping brush for a more freehand look.
French Manicure and Lace Nails
French manicures are elegant, timeless, and perfect for any occasion. To create a French manicure, you can use tape to create a straight line across the tip of your nails. You can add lace accents to your nails for a more intricate look. You can use lace stickers or apply lace appliques to your nails.
Ombre Nails and Gradient Effect
Ombre nails and gradient effects are a popular nail art trend that can be achieved with a sponge. To create an ombre effect, you can paint your nails with two or more colors and then use a sponge to blend the colors. You can use a brush to blend the colors together for a gradient effect.
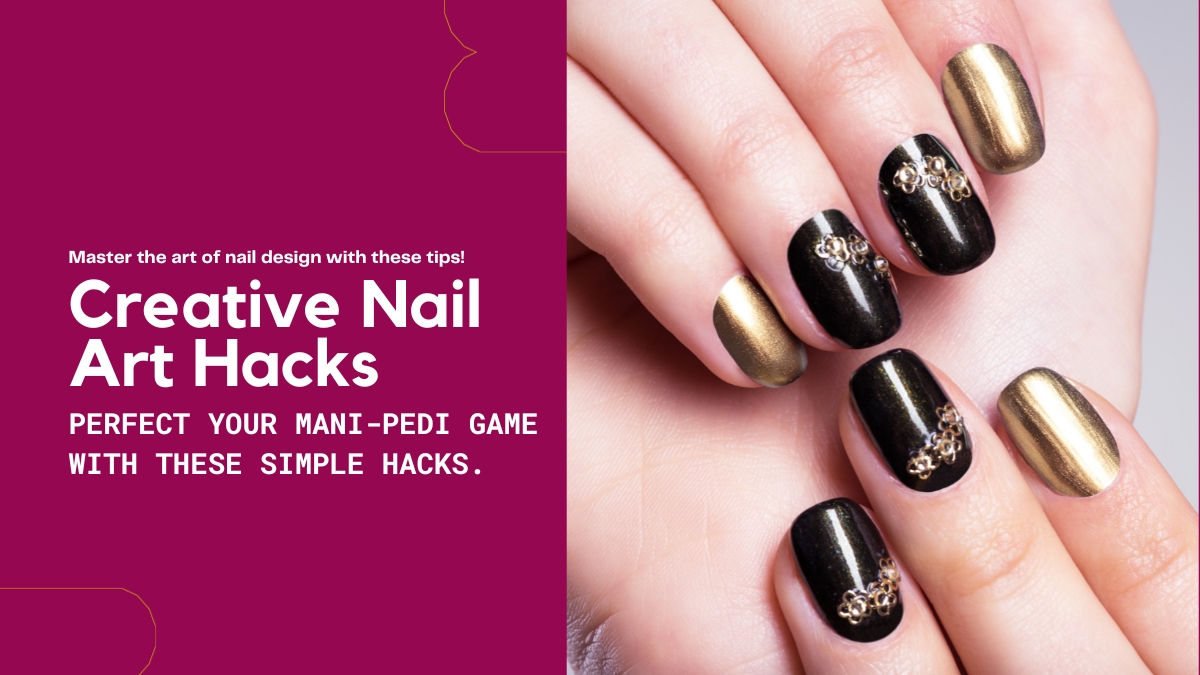
Turquoise and Gold Stone Design
Turquoise and gold stone designs are perfect for adding a touch of glamour to your nails. To create this design, you can use a base color of turquoise and then add gold accents using a brush or a toothpick. You can add rhinestones or other embellishments to your nails for a dramatic effect.
These are just a few creative nail art designs you can try at home. You can create unique nail art designs that reflect your style with practice and patience.
Unconventional Nail Art Tools
When it comes to nail art, sometimes the best tools are not explicitly made for nails. In this section, we’ll explore some unconventional tools that can help you create unique and eye-catching nail art designs.
Using Office Supplies
Believe it or not, some office supplies can be repurposed as nail art tools. For example, a mechanical pencil can create small dots or intricate designs. Remove the lead and use the tip to apply polish to your nails. An eyeliner pen can also make fine lines or intricate details.
Exploring Home Items
You might be surprised at how many items in your home can be used for nail art. A toothpick, for example, can be used to create small dots or swirls. A fan brush, typically used for painting, can create a unique ombre effect on your nails.
Beauty Tools for Nail Art
While some beauty tools are specifically designed for nail art, others can be used unconventionally. A makeup sponge, for example, can be used to create a gradient effect on your nails. Paint the different colors onto the sponge and dab it onto your nails. A striping brush, typically used for eyeliner, can also create fine lines on your nails.
In conclusion, don’t be afraid to experiment with unconventional tools when it comes to nail art. You might be surprised at the creative designs you can develop using everyday items.
Nail Art Hacks
Here are a few nail art hacks to help you achieve professional-looking nails at home. We’ve compiled some of the best hacks that use everyday household items like rubber bands, cooking spray, ice water, foil, acetone, and petroleum jelly.
Precision with Rubber Band and Toothpick
Creating intricate nail art can be challenging, but you can quickly achieve precision with this hack. Start by placing a rubber band around your nail, exposing the area you want to paint. Then, use a toothpick to create your desired design. The rubber band will act as a barrier, preventing mistakes and keeping your design clean.
Quick Dry with Cooking Spray and Ice Water
Waiting for your nails to dry can be tedious, but this hack will speed up the drying time. After applying your nail polish, spray cooking spray onto your nails. Then, dip your nails into a bowl of ice water for a few minutes. The cooking spray will help the polish dry quickly, and the ice water will set the polish in place.
Easy Removal with Foil and Acetone
Removing nail polish can be messy and time-consuming, but this hack makes it a breeze. Start by soaking a cotton ball in acetone and placing it on your nail. Then, wrap your nail in foil and let it sit for a few minutes. The foil will keep the cotton ball in place and help the acetone penetrate the polish, making it easier to remove.
Protecting Skin with Petroleum Jelly
Painting your nails can be messy, but this hack will help keep your skin clean. Apply a small amount of petroleum jelly around your nails before painting them. The petroleum jelly will act as a barrier, preventing polish from getting on your skin. Plus, wiping away any excess polish with a cotton swab is easy.
Try out these nail art hacks to achieve salon-quality nails at home. You can easily create stunning nail art designs with creativity and a few household items.
Adding the Finishing Touches

When it comes to nail art, the finishing touches can make all the difference. Here are some creative nail art hacks to take your manicure to the next level.
Using Glitter Nail Polish
Glitter nail polish is a great way to add sparkle to your nails. One of our favorite hacks is to use a makeup sponge to apply glitter polish. Paint the glitter polish onto the sponge and dab it onto your nails. This will give you a more even application and prevent the glitter from clumping.
Another fun hack is to create a glitter gradient by painting the glitter polish onto the tips of your nails and gradually fading it out towards the base.
Enhancing with Rhinestones
Rhinestones are a great way to add some bling to your nails. To apply rhinestones, use a toothpick or a dotting tool to apply a small dot of clear nail polish where you want to place the rhinestone. Then, use a pair of tweezers to place the rhinestone onto the dot of nail polish carefully. Once the nail polish has dried, apply a top coat to seal in the rhinestones.
For a more dramatic look, try using different sizes and colors of rhinestones to create a unique design.
Creating Effects with Corn Starch
Corn starch is a surprising ingredient that can create various nail art effects. Mix a small amount of cornstarch into your nail polish to create a textured look before applying it to your nails. This will give your nails a matte, grainy finish.
Mix a small amount of cornstarch into a clear top coat and apply it over your polish for a more subtle effect. This will give your nails a slightly matte finish.
Final Touch with Sharpie
Sharpies can be used to add some fun designs to your nails. Use a fine-tipped Sharpie to draw on your nails to create a unique design. Once you’re happy with the design, apply a top coat to seal it in.
One fun hack is to create a negative space design by painting your nails with a light color and then using a Sharpie to draw on a design in the bare areas. This will give you a unique, hand-drawn look.
These finishing touches are great ways to take your nail art to the next level. Experiment with different techniques and have fun with them!
Troubleshooting Nail Art Problems
Sometimes, even the most experienced nail artists run into problems. But don’t worry, we’ve got you covered. Here are some common nail art problems and how to troubleshoot them.
Dealing with Nail Polish Remover
If you accidentally smudge your nail polish or make a mistake, don’t worry. You can fix it with a nail polish remover. Here’s how:
- Take a cotton swab and dip it in nail polish remover.
- Gently rub the smudged or mistake area until the polish is removed.
- Let your nails dry completely before applying a new coat of polish.
But be careful not to use too much nail polish remover, as it can dry out your nails and cuticles. Instead, use just enough to remove the polish.
Repainting with Paint Over It Method
If you don’t have time to remove your old nail polish, use the paint-over-it method. Here’s how:
- Apply a coat of clear nail polish over your old polish.
- Let it dry completely.
- Apply your new color over the clear coat.
This method works best with light colors and glitter. It may not work as well with dark colors or if you have multiple layers of polish. But it’s a great way to save time and still have a great-looking manicure.
Remember, if you have any other nail art problems, don’t hesitate to ask for help. There’s always a solution!
Learning from Video Tutorials
We believe video tutorials are among the best ways to learn new nail art hacks. Watching someone else do a technique can be much more helpful than just reading about it. Plus, you can pause, rewind, and re-watch as many times as needed to understand the process thoroughly.
When searching for nail art tutorials, we recommend starting with YouTube. Countless channels are dedicated to nail art, and many have step-by-step tutorials for various techniques. You can also find tutorials on Instagram and TikTok, which are usually shorter and less in-depth.
When watching a tutorial, paying attention to the details is essential. Look at the artist’s tools and products and try to replicate them as closely as possible. Remember that some products may not be available in your area, so you may need to find alternatives.
Another tip is to practice on a fake nail or nail wheel before trying the technique on yourself or someone else. This will help you understand the process and avoid mistakes that could ruin a natural manicure.
Finally, don’t be afraid to experiment and put your spin on the technique. Nail art is about creativity and self-expression, so make it your own.
In conclusion, video tutorials are a fantastic resource for learning new nail art hacks. They allow you to see the technique and learn at your own pace. Remember to pay attention to the details, practice on a fake nail, and put your spin on things.
Leave a Reply