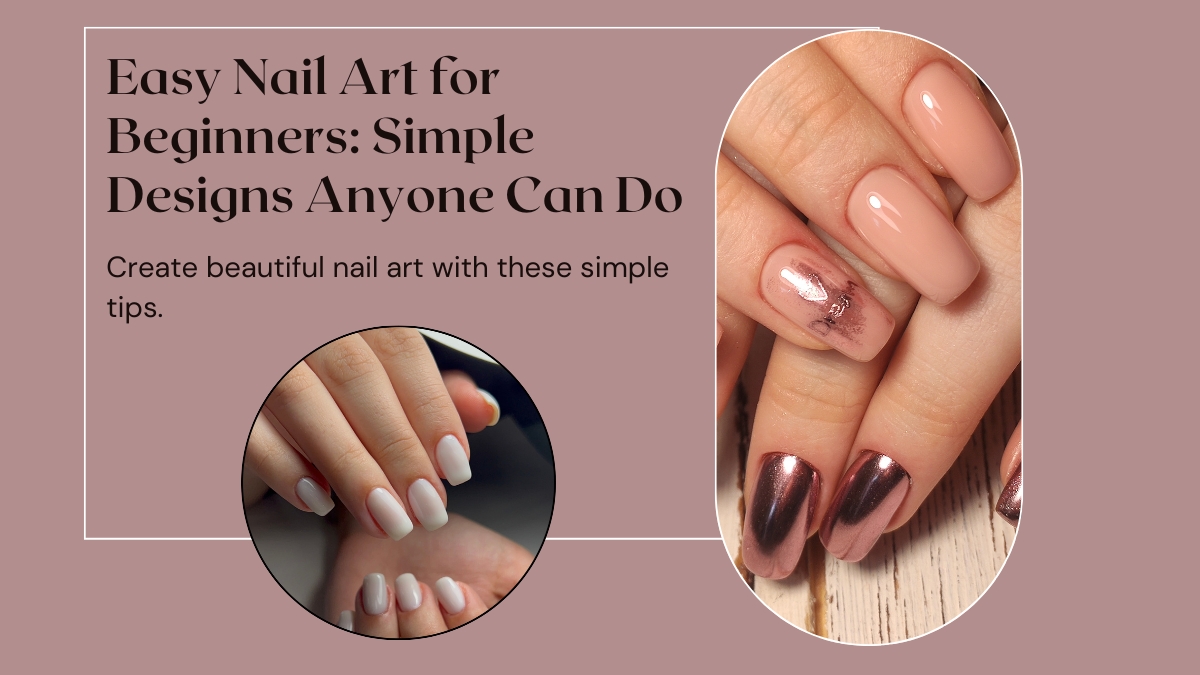
Are you a beginner in the world of nail art? Do you want to try some easy nail art designs at home? Look no further! This article will guide you through some of the most accessible nail art designs you can create at home without professional help.
Nail art is a fun way to express creativity and add color to your nails. However, it can seem daunting for beginners. That’s why we have compiled a list of simple and easy nail art designs that require minimal effort and time. Whether you are looking for a chic and elegant design or a fun and playful one, we have covered you.
So, if you are a beginner and want to try some easy nail art designs at home, keep reading. We will provide step-by-step instructions and tips to create beautiful nail art designs to make your nails stand out. Let’s get started!
Table of contents
Understanding Nail Art
Nail art is a creative way to decorate nails using various materials, tools, and techniques. It has become increasingly popular over the years, with many people opting for unique nail designs to express their personality or add a touch of glamour to their look. In this section, we will provide an overview of nail art, including its history, different types of designs, and some easy nail art ideas for beginners.
History of Nail Art
The practice of decorating nails dates back to ancient times, with evidence of nail art found in Chinese and Egyptian cultures. However, it wasn’t until the 20th century that nail art became popular in the Western world. In the 1970s, acrylic nails were introduced, which provided a canvas for nail artists to create intricate designs and patterns.
Types of Nail Art Designs
Countless nail art designs range from simple and elegant to bold and elaborate. Some popular designs include:
Easy Nail Art Ideas for Beginners
If you’re new to nail art, there are plenty of easy designs to get you started. Here are some ideas:
In conclusion, nail art is a fun and creative way to express yourself and add flair to your look. Anyone can create beautiful and unique nail designs with some practice and easy nail art ideas.
Basic Nail Art Tools

When it comes to nail art, having the right tools can make all the difference. Here are some essential nail art tools that we recommend for beginners:
Nail Polish
Of course, you’ll need some nail polish to create your nail art designs. You can use nail polish, but we recommend starting with a few primary colors like black, white, red, and blue. You can also experiment with different finishes like matte, glitter, and metallic.
Dotting Tool
A dotting tool is a small tool with a rounded tip that you can use to create dots on your nails. The dotting tool can create polka dots, flowers, and other designs. If you don’t have a dotting tool, you can use a bobby pin or the end of a toothpick.
Nail Stickers
Nail stickers are a great way to add flair to nail art designs. You can find nail stickers in various shapes and designs, from flowers and butterflies to geometric patterns and animal prints.
Bobby Pin
As mentioned, a bobby pin can be used as a makeshift dotting tool. You can also use a bobby pin to create other designs like stripes and swirls.
Nail File
A nail file is an essential tool for any nail art enthusiast. You’ll need to file your nails to create a smooth surface for your nail polish. You can also use a nail file to shape your nails into different shapes like square, oval, or almond.
Thin Nail Art Brush
A thin nail art brush is perfect for creating intricate designs like flowers, leaves, and vines. You can use a thin nail art brush to create fine lines and details that are difficult to achieve with a regular nail polish brush.
You can create various nail art designs with these essential nail art tools. As you become more experienced, you can add more tools to your collection, like striping tape, stamping plates, and rhinestones.
Preparation for Nail Art
Before we start with the fun part of creating nail art designs, we must prepare our nails properly. This preparation will ensure that our nail art stays on for longer and looks neat and professional. Here are some steps to follow for the perfect nail art preparation.
Manicure
The first step is to give yourself a good manicure. This means cutting and filing your nails to the desired length and shape. Make sure to point in one direction to prevent damage to your nails. You can also use a buffer to smooth out any ridges on the surface of your nails.
At-Home Manicure
If you want to take your preparation to the next level, you can do an at-home manicure. This involves soaking your nails in warm, soapy water for a few minutes to soften the cuticles. Then, using a cuticle pusher, gently push back the cuticles. Be careful not to cut them, as this can lead to infections.
Base Coat
Before applying any nail polish, it’s essential to use a base coat. This will protect your nails from staining and help the nail polish adhere better. Apply a thin layer of base coat and let it dry completely before moving on to the next step.
Cuticles
If you have any excess cuticles, you can use a cuticle nipper to trim them. Be careful not to cut too much, which can cause bleeding and infections. You can also use a cuticle oil to moisturize and soften your cuticles.
Nail Polish Remover
If you have any old nail polish on your nails, remove it before starting your nail art. Use a non-acetone nail polish remover to prevent any damage to your nails.
These simple steps give you the perfect canvas for your nail art designs. Take your time and patience; you’ll have beautiful nails soon!
Simple Nail Art Designs
When it comes to nail art, sometimes less is more. Simple nail art designs are perfect for beginners who want to try nail art without being overwhelmed. Some simple nail art designs are easy to create and look great.
Dots
Dots are a classic nail art design that is easy to create. You only need a dotting tool, a toothpick, and two different nail polish colors. Start by painting your nails with a base color and let them dry completely. Then, dip your dotting tool or toothpick into the second nail polish color and create dots on your nails. You can create a pattern or randomly place the dots for a unique design.
Negative Space
Negative space nail art is a minimalist design that looks chic and modern. Start by painting your nails with a base color and let them dry completely. Then, use a nail art brush or tape to create a negative space design on your nails. You can create geometric shapes, stripes, or any design you like.
Half Moons
Half Moons is a classic nail art design that is easy to create. Start by painting your nails with a base color and let them dry completely. Then, use a hole reinforcement sticker or tape to create a half-moon shape at the base of your nails. Paint the rest of your nails with a different color and let them dry completely. Remove the sticker or tape to reveal the half-moon design.
Floral Design
Floral designs are beautiful and feminine nail art design that is easy to create. Start by painting your nails with a base color and let them dry completely. Then, use a nail art brush or toothpick to make flowers on your nails. You can create a pattern or randomly place the flowers for a unique design.
These simple nail art designs are easy to create and perfect for beginners. Whether you choose dots, negative space, half moons, or a floral design, you can create a unique and beautiful nail art design you’ll love.
Tutorial for Beginners
If you’re new to nail art, don’t worry! We’ve got you covered with some easy tutorials perfect for beginners. With some practice, you can create beautiful, unique designs to make your nails stand out.
DIY Nail Art Tutorials
Many DIY nail art tutorials are available online to help you get started. You can find step-by-step instructions for various designs, from simple stripes and polka dots to more intricate patterns like florals and ombre.
One of the best things about DIY tutorials is that you can follow along at your own pace and customize the design to your liking. You can choose your colors, add glitter or rhinestones, and experiment with different techniques to create a look that’s uniquely yours.
Beginner-Friendly Designs
If you’re starting, it’s a good idea to stick to designs that are easy to create. Some beginner-friendly designs include:
- French manicure
- Polka dots
- Stripes
- Glitter accent nails
- Ombré nails
These designs are simple yet stylish and can be created using essential nail art tools like striping tape, dotting tools, and nail stencils.
Tips for Beginners
Here are a few tips to keep in mind as you’re getting started with nail art:
- Practice makes perfect! Don’t be discouraged if your first few attempts don’t turn out perfectly.
- Use a good-quality base and top coat to help your nail art last longer.
- Invest in essential nail art tools like striping tape, dotting tools, and nail stencils.
- Don’t be afraid to experiment with different colors and designs to find what works best for you.
With these tips and some easy tutorials, you’ll be well on your way to creating beautiful nail art designs you can be proud of.
French Manicure and Tips
French manicure is a classic and elegant nail art style perfect for any occasion. It involves painting the tips of your nails with white polish while leaving the rest of the nail bed neutral or nude. Here are some tips to help you achieve a perfect French manicure:
1. Prep your nails
Before applying any polish, make sure to prep your nails properly. Start by removing old polish and filing your nails into your desired shape. Next, push back your cuticles and trim any hangnails. Finally, buff your nails to smooth out any ridges or bumps.
2. Apply a base coat
To ensure that your French manicure lasts longer, apply a base coat. This will also protect your nails from staining. Allow the base coat to dry completely before moving on to the next step.
3. Paint the tips
Using a white polish, carefully paint the tips of your nails. You can either freehand the tips or use French tip guides to help you achieve a straight line. Apply two coats of white polish for a more opaque finish.
4. Apply a top coat
Once the white polish has dried, apply a top coat to seal in the color and add shine. This will also help your French manicure last longer. Apply the top coat evenly and allow it to dry completely.
5. Try Gel Polish
If you want your French manicure to last longer, try gel polish. Gel polish is more durable than regular polish and can last up to two weeks without chipping. However, it requires a UV lamp to cure the polish.
French manicure is a timeless nail art style that is easy to achieve at home. With these tips, you can create a perfect French manicure that will look great for any occasion.
Seasonal Nail Art Ideas
When it comes to nail art, there is no better way to keep up with the seasons than by switching up your nail designs. From spring florals to winter snowflakes, there are endless possibilities. Here are some seasonal nail art ideas to try out:
Spring
Spring is all about pastels and florals. Try out a light pink ombre with a white floral accent nail. Or, go for a fun confetti dot design with shades of pink, yellow, and green. Try painting your nails with a light blue polish and adding a few gold accents for a more subtle look.
Summer
Summer is all about bright colors and bold designs. Try a sparkly golden stripe design on a white base, or go for a starry detail design with a navy blue base and silver glitter accents. Try painting your nails with a rainbow ombre or a fun watermelon design for a more playful look.
Fall
Fall is all about warm tones and cozy vibes. Try out a half-and-half design with a burnt orange and deep brown polish. Or, go for a Galaxy nail design with shades of purple and blue. For a more romantic look, try painting your nails with heart-shaped tips in shades of red and burgundy.
Winter
Winter is all about snowflakes and glitter. Try out a white base with silver glitter accents for a simple yet elegant look. Or, go for a more intricate design with a snowflake accent nail on a deep blue base. Try painting your nails with a red and green ombre or a fun reindeer design for a more festive look.
No matter the season, there is a nail art design for everyone. Whether you prefer a simple, subtle, bold, and intricate design, endless possibilities exist. So, grab your favorite nail polish and get creative!
Finishing Your Nail Art
Once you have completed your nail art design, it’s essential to finish it off with a top coat to protect it and make it last longer. A clear top coat is the most common type of top coat used for nail art. It’s applied over the design to give it a glossy finish and protect it from chipping, smudging, and fading.
When applying a clear top coat, ensure your design is arid. Apply a thin layer of top coat and let it dry completely before applying a second layer. This will help prevent smudging and ensure a smooth, even finish.
If you want your nail art to last longer, consider using a gel base and top coat. The gel base and top coats are formulated to provide extra protection and durability. They are cured with a UV or LED lamp, which helps the top coat to harden and stay in place for up to two weeks.
Follow the manufacturer’s instructions carefully when using a gel base and top coat. Apply the base coat evenly and cure it for the recommended time. Apply your nail art design on top of the base coat, then use the top coat and cure it under the lamp.
In addition to protecting your nail art, a top coat can also help enhance its appearance. Some top coats are formulated with glitter or shimmer to add sparkle to your design. Others have a matte finish, giving nail art a more subtle, sophisticated look.
Overall, finishing your nail art with a top coat is essential to ensure it lasts as long as possible. Whether you use a clear top coat or a gel base and top coat, apply it carefully and let it dry completely before doing anything else. With the right finishing touches, your nail art will look great for days to come.
Exploring Nail Art Trends
As nail art continues gaining popularity, staying current on the latest trends is essential. We’ve scoured social media, Pinterest, and Amazon to bring you some of the most exciting nail art trends that are perfect for beginners.
One trend we’ve noticed is using exciting shapes and patterns. There are endless possibilities for creating unique nail art, from geometric shapes to abstract designs. Mood nails are also becoming more popular, with color-changing polishes that react to temperature changes or your mood.
Social media is a great place to find inspiration for your next nail art design. Instagram and TikTok are particularly popular for showcasing nail art, with many talented artists sharing their work. Pinterest is another excellent resource for finding nail art ideas, with thousands of boards dedicated to the topic.
If you’re new to nail art, Amazon has a wide selection of starter kits and tools to help you get started. These kits typically include everything you need to create basic designs, such as brushes, dotting tools, and striping tape.
Overall, nail art is a fun and creative way to express yourself. With so many different trends and techniques to try, there’s something for everyone. The possibilities are endless, whether you want to create a bold statement or a subtle accent nail.
Expert Tips and Advice
We understand that starting with nail art can be overwhelming, but don’t worry; we’ve got you covered. Here are some expert tips and advice to help you create beautiful nail art designs:
1. Prep your nails properly
Before starting with any nail art design, it’s crucial to prep your nails properly. This means cleaning them with rubbing alcohol to remove any oils or residue. This will help the polish adhere better and last longer.
2. Invest in good quality nail polish
Good quality nail polish is crucial for creating beautiful nail art designs. We recommend using brands like OPI, Essie, and Sally Hansen. These brands offer various colors and finishes, including red, white, and green nail polish.
3. Practice makes perfect
Nail art is all about practice. Don’t be discouraged if your first few attempts don’t appear as expected. Keep practicing, and you’ll get better with time.
4. Get inspiration from social media
Social media is an excellent source of inspiration for nail art designs. Follow nail artists and salons on Instagram and Pinterest to get ideas for your next nail art design.
5. Use striping tape for clean lines
Striping tape is essential for creating clean lines in nail art designs. Apply the tape to your nails before painting, and once the polish is dry, carefully remove the tape to reveal a clean line.
6. Don’t forget the topcoat
Applying a topcoat to your nail art design is crucial for making it last longer. It also adds shine and gives a finished look to your nails.
In conclusion, these expert tips and advice will help you easily create beautiful nail art designs. Remember, practice makes perfect, so don’t be discouraged if your first few attempts don’t turn out as expected. Keep trying, and you’ll become a pro in no time.
Expressing Yourself Through Nail Art
Nail art is a fun and creative way to express yourself and show your personality. With so many different styles and designs, you can create a unique look that is all your own. Whether you prefer a classic French manicure or something more edgy like almond or coffin-shaped nails, there’s a nail art style that is perfect for you.
One of the great things about nail art is that it can be easily customized to suit your style. Whether you prefer a bold and bejeweled look or something more understated, there are plenty of options. You can add gems, glitter, or other embellishments to create a look that is uniquely yours.
Nail art is also a great way to experiment with makeup and try out new looks. You can match your nails to your outfit or use them to add color to your overall look. With so many different colors and designs to choose from, the possibilities are endless.
When it comes to nail art, the sky’s the limit. Whether you want to go all out with a complex design or keep things simple with a classic French manicure, there’s a look that is perfect for you. So why not express yourself through your nails and let your creativity shine?
Leave a Reply